# RBAC & Private Routes in Next.js with Clerk using NextShield.
Hello everyone! I'm Julián.

The past few weeks [I've introduced my library called NextShield](https://blog.imjulian.com/rbac-and-private-routes-in-nextjs) and show an [example using it with Supabase](https://blog.imjulian.com/nextshield-supabase). Today's example is using [NextShield](https://imjulianeral.github.io/next-shield/) with [Clerk](https://clerk.dev/), so let's get started 🚀.

## Get a Clerk account.
- Go to [Clerk's site](https://clerk.dev/) and click on `Sign Up`:

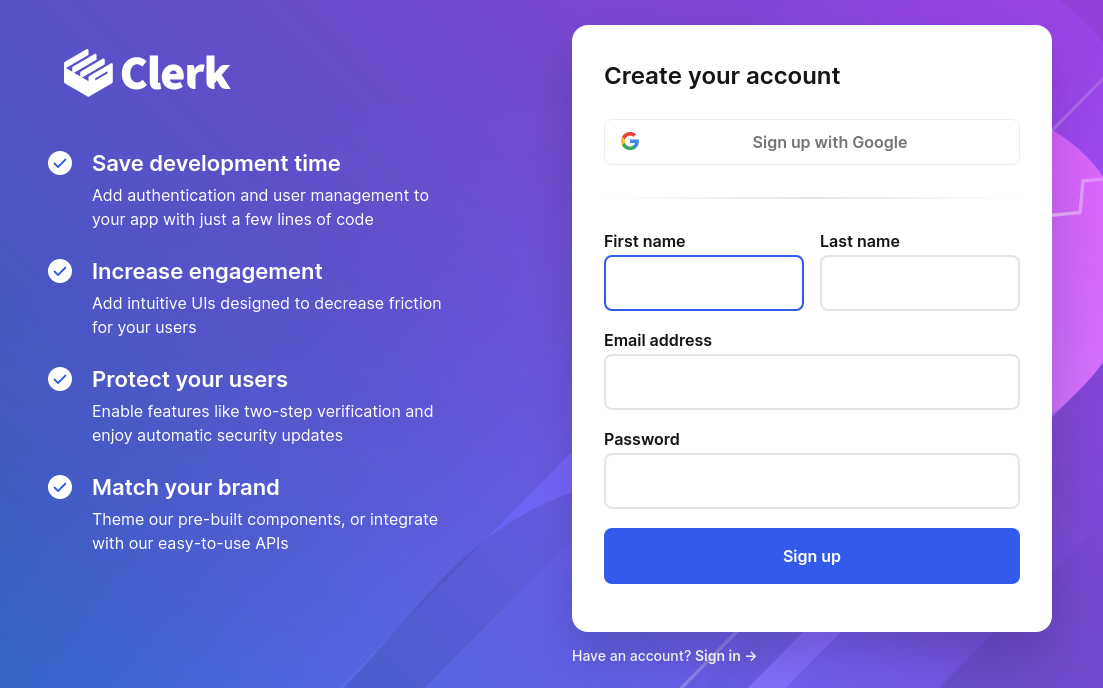
- And create your account:
## Create a Clerk App.
- Go to your Dashboard and click on `Create application`:

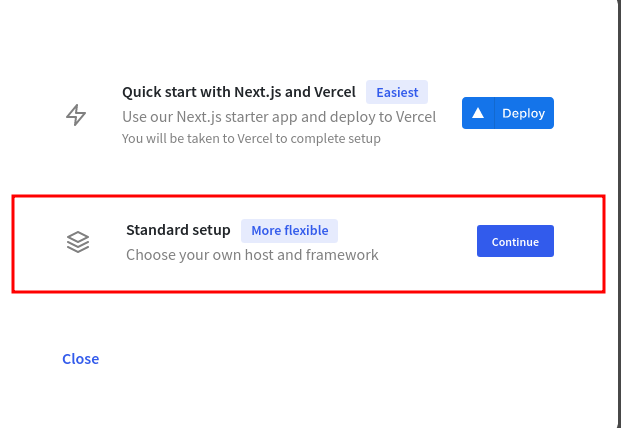
- Choose `Standard Setup`:
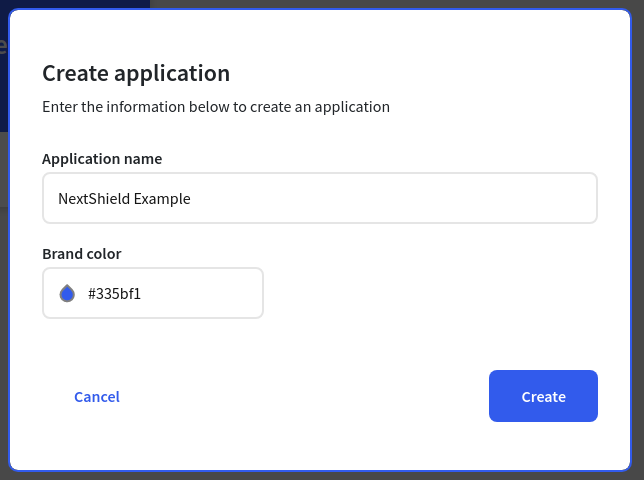
- Put your App's name and choose a color:
That's it, let's create a Next.js app with NextShield.
## Create a Next.js App with NextShield.
For this tutorial you need to create a Next.js app configured with NextShield, to do so, you can follow the instructions of [my first post](https://blog.imjulian.com/rbac-and-private-routes-in-nextjs) or [just clone the repo](https://github.com/imjulianeral/nextshield-examples) (clone the main branch).
That's it, let's set up the NextShield with Clerk.
## Set Up NextShield with Clerk.
### Instal Dependencies.
- First install the clerk package:
```bash
npm i @clerk/nextjs
```
### Get API Key.
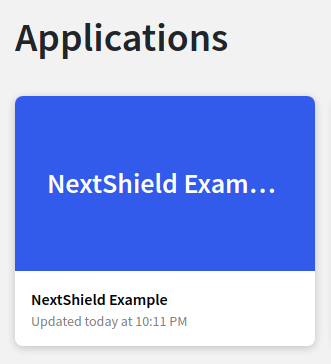
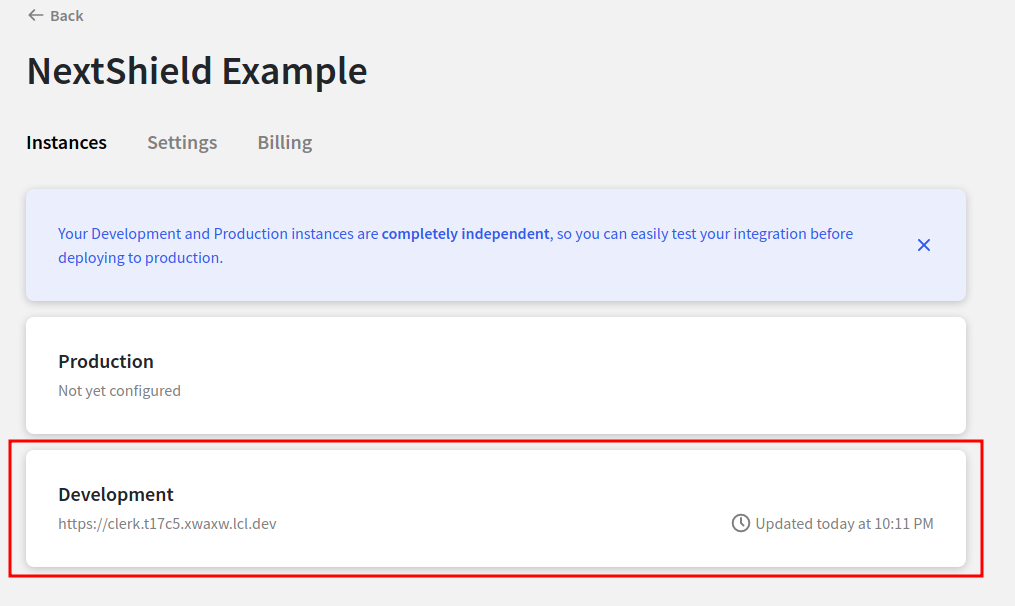
- Then go to your dashboard and select your app:
- Select the development environment:
- Scroll down a little bit to see the `Instance Configuration` section to get the `Frontend API` key:
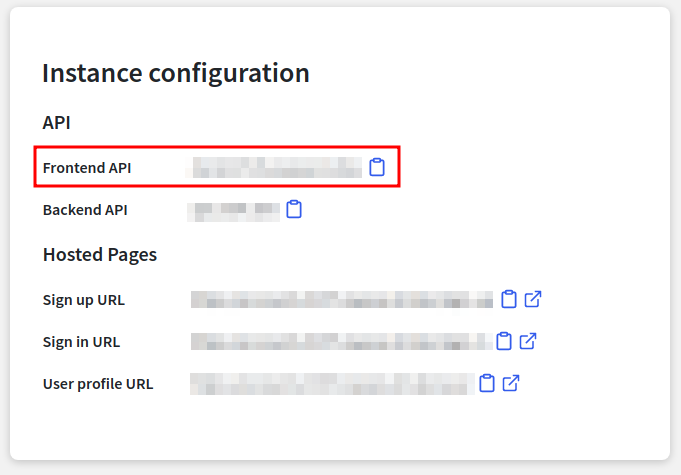
- Go to your Next.js app and create a `.env.local` file at the root of the project and setup the following variable with your key:
```env
NEXT_PUBLIC_CLERK_FRONTEND_API="FRONTEND API KEY HERE"
```
### Set URLs.
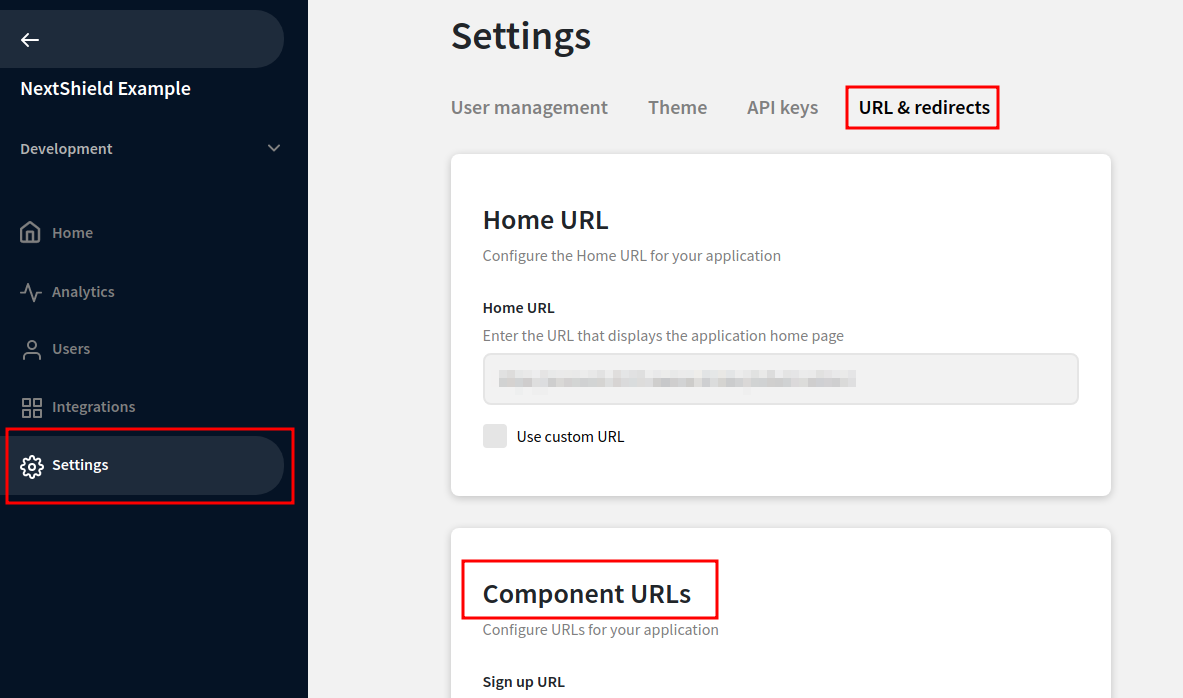
- Now go back to your Clerk app and click on `Settings -> URL & Redirects -> Component URLs`:
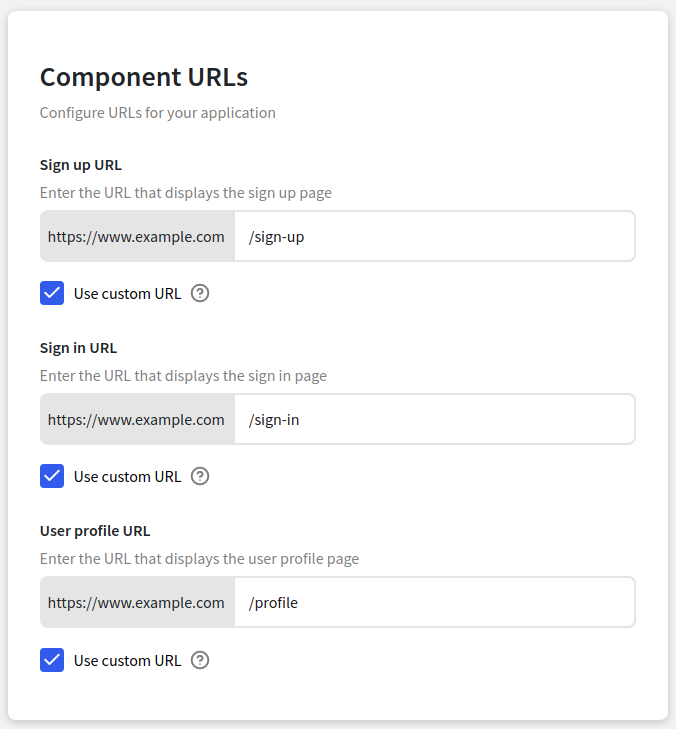
Enable `Use Custom URL` on each field and write the following values:
### Auth Providers.
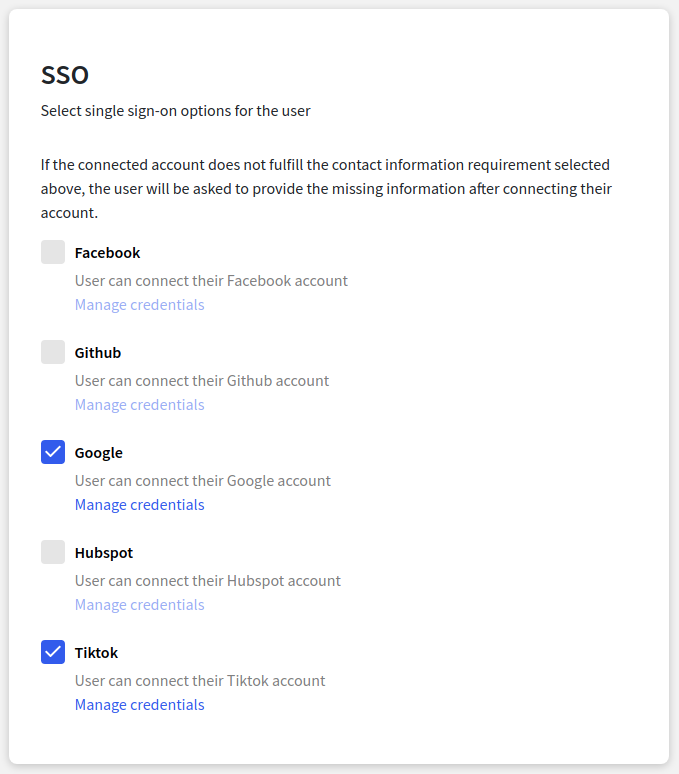
- Also in `Settings -> User management` select your preferred providers.
### Bind Next.js & Clerk.
- Open your file `_app.tsx` and put the `ClerkProvider`:
```jsx
import type { AppProps } from 'next/app'
import { ClerkProvider } from '@clerk/nextjs'
import { Shield } from '@/components/routes/Shield'
import '@/styles/globals.css'
export default function MyApp({ Component, pageProps }: AppProps) {
return (
)
}
```
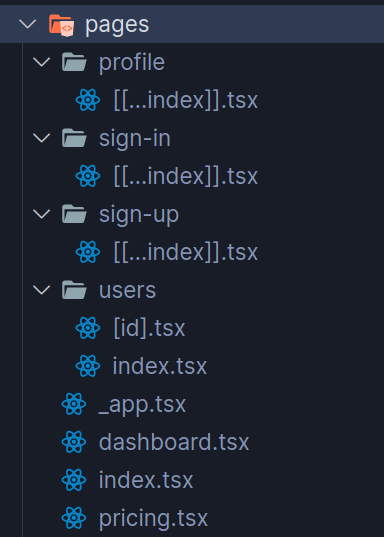
- Update the `pages` directory with the following folder structure:
- Also update the `Nav` component adding the sign in & out routes:
```jsx
import Link from 'next/link'
export function Nav() {
return (
)
}
```
- Add the following content for the `index.tsx` and `pricing.tsx` files:
```jsx
import { Layout } from '@/components/routes/Layout'
export default function PageName() {
return (
PageName
)
}
```
- For the `dashboard.tsx`, `users/index.tsx` and `users/[id].tsx` files, update the content to:
```jsx
import { Layout } from '@/components/routes/Layout'
import { UserButton } from '@clerk/nextjs'
export default function PageName() {
return (
PageName
)
}
```
Finally, add the Clerk components on the pages that we defined in our dashboard:
- For `sign-up/[[...index]].tsx`:
```jsx
import { SignUp } from '@clerk/nextjs'
export default function SignUpPage() {
return (
<>
)
}
```
- For `sign-in/[[...index]].tsx`:
```jsx
import { SignIn } from '@clerk/nextjs'
export default function SignInPage() {
return (
<>
)
}
```
And the `profile/[[...index]].tsx`:
```jsx
import { Layout } from '@/components/routes/Layout'
import { UserProfile } from '@clerk/clerk-react'
export default function Profile() {
return (
)
}
```
### Bind NextShield & Clerk.
Finally the interesting part 🥳.
- Go to the `Shield` component and import:
```js
import { useUser } from '@clerk/nextjs'
```
- Use this hook passing the parameter `withAssertions` set to `true`, this is because in that way we can access to `isLoading` and `isSignedIn` functions, which are must to have in NextShield parameters.
```js
const { user, isLoading, isSignedIn } = useUser({ withAssertions: true })
```
- Then update the `NextShieldProps` with the following:
```js
const shieldProps: NextShieldProps<
['/profile/[[...index]]', '/dashboard', '/users', '/users/[id]'],
['/', '/sign-in', '/sign-up']
> = {
router,
isAuth: isSignedIn(user),
isLoading: isLoading(user),
privateRoutes: ['/profile/[[...index]]', '/dashboard', '/users', '/users/[id]'],
publicRoutes: ['/', '/sign-in', '/sign-up'],
hybridRoutes: ['/pricing'],
loginRoute: '/sign-in',
accessRoute: '/dashboard',
LoadingComponent: ,
}
```
- The complete component should look like this:
```jsx
import { useRouter } from 'next/router'
import { NextShield, NextShieldProps } from 'next-shield'
import { useUser } from '@clerk/nextjs'
import { Children } from '@/types/Components'
import { Loading } from './Loading'
export function Shield({ children }: Children) {
const router = useRouter()
const { user, isLoading, isSignedIn } = useUser({ withAssertions: true })
const shieldProps: NextShieldProps<
['/profile/[[...index]]', '/dashboard', '/users', '/users/[id]'],
['/', '/sign-in', '/sign-up']
> = {
router,
isAuth: isSignedIn(user),
isLoading: isLoading(user),
privateRoutes: ['/profile/[[...index]]', '/dashboard', '/users', '/users/[id]'],
publicRoutes: ['/', '/sign-in', '/sign-up'],
hybridRoutes: ['/pricing'],
loginRoute: '/sign-in',
accessRoute: '/dashboard',
LoadingComponent: ,
}
return {children}
}
```
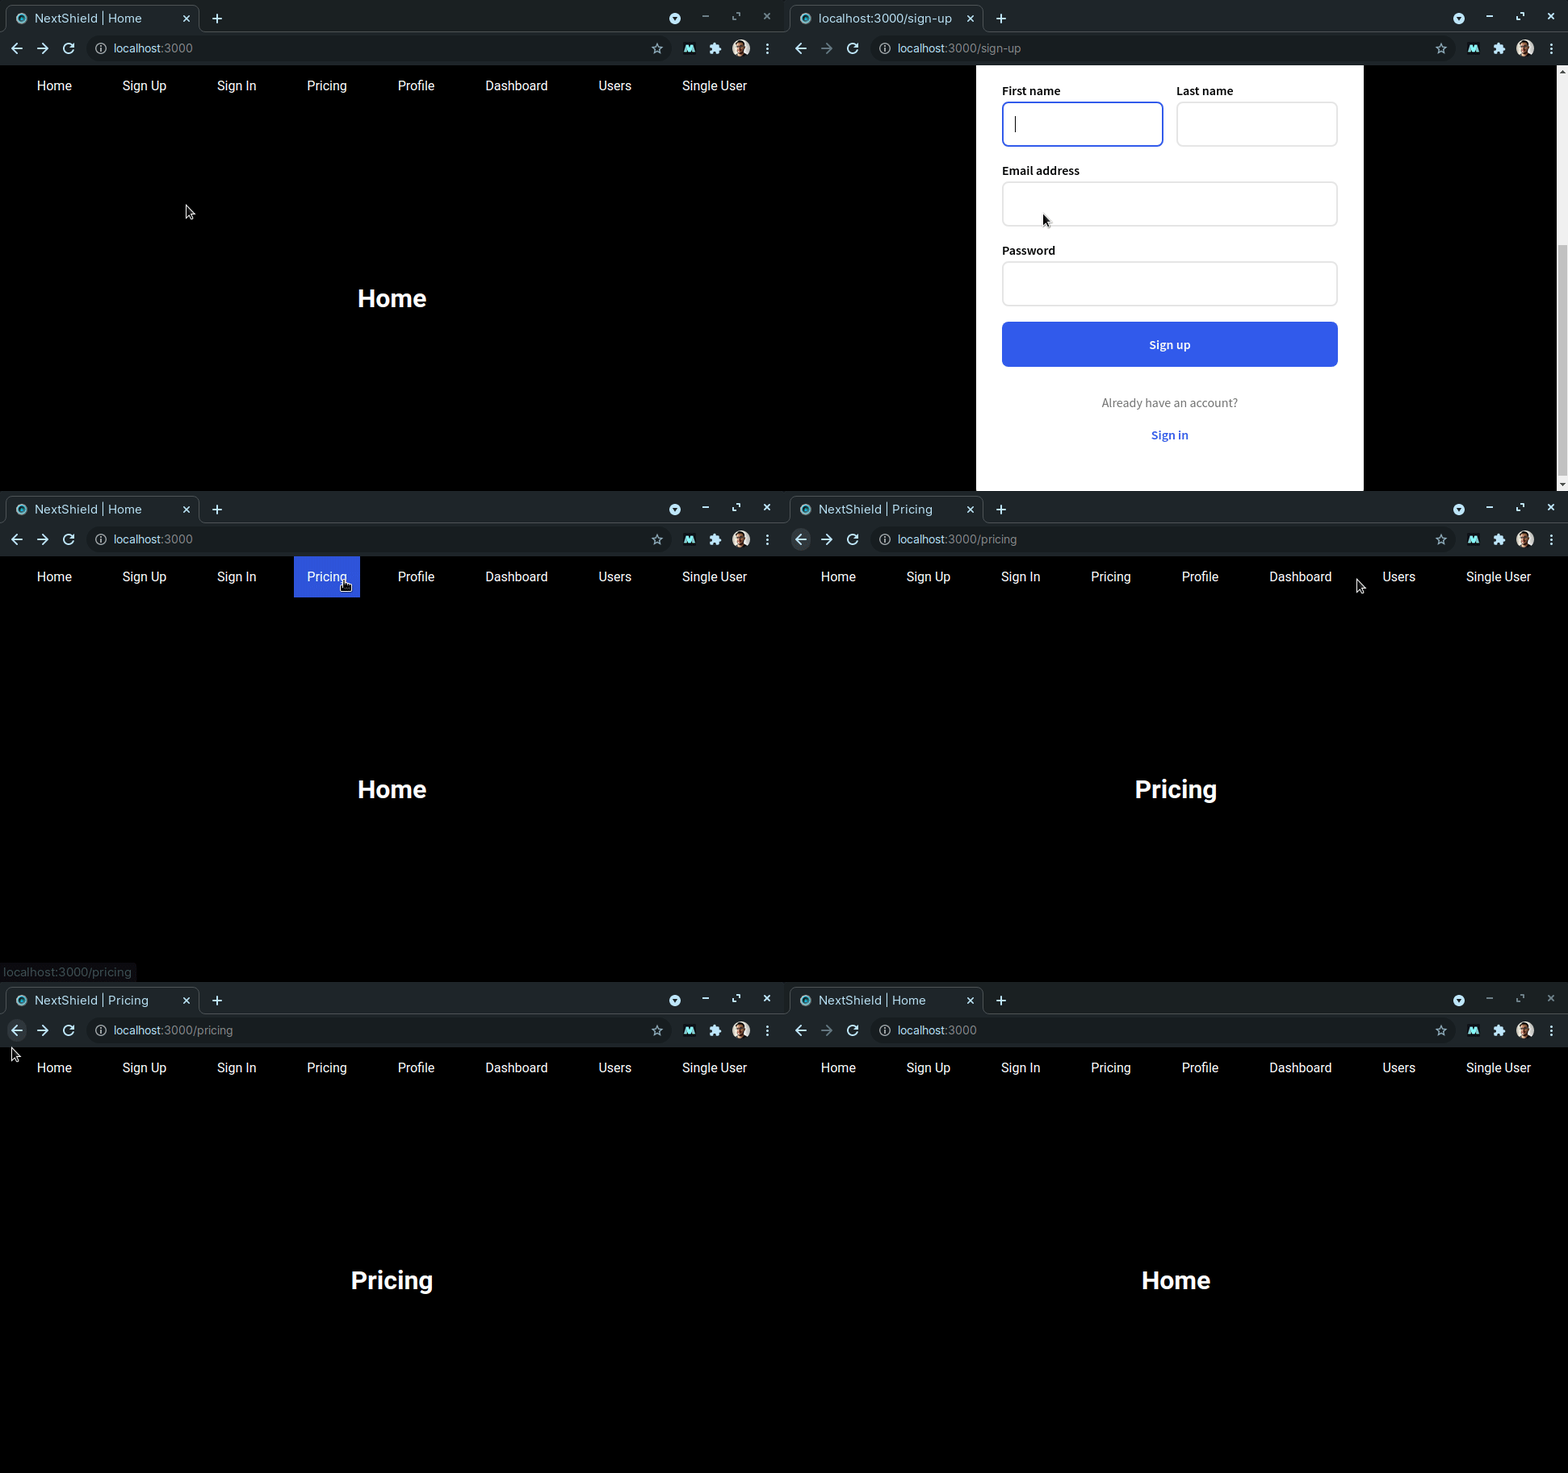
- By now, you should have something like this, you only have access to public and hybrid routes when you're logged out:
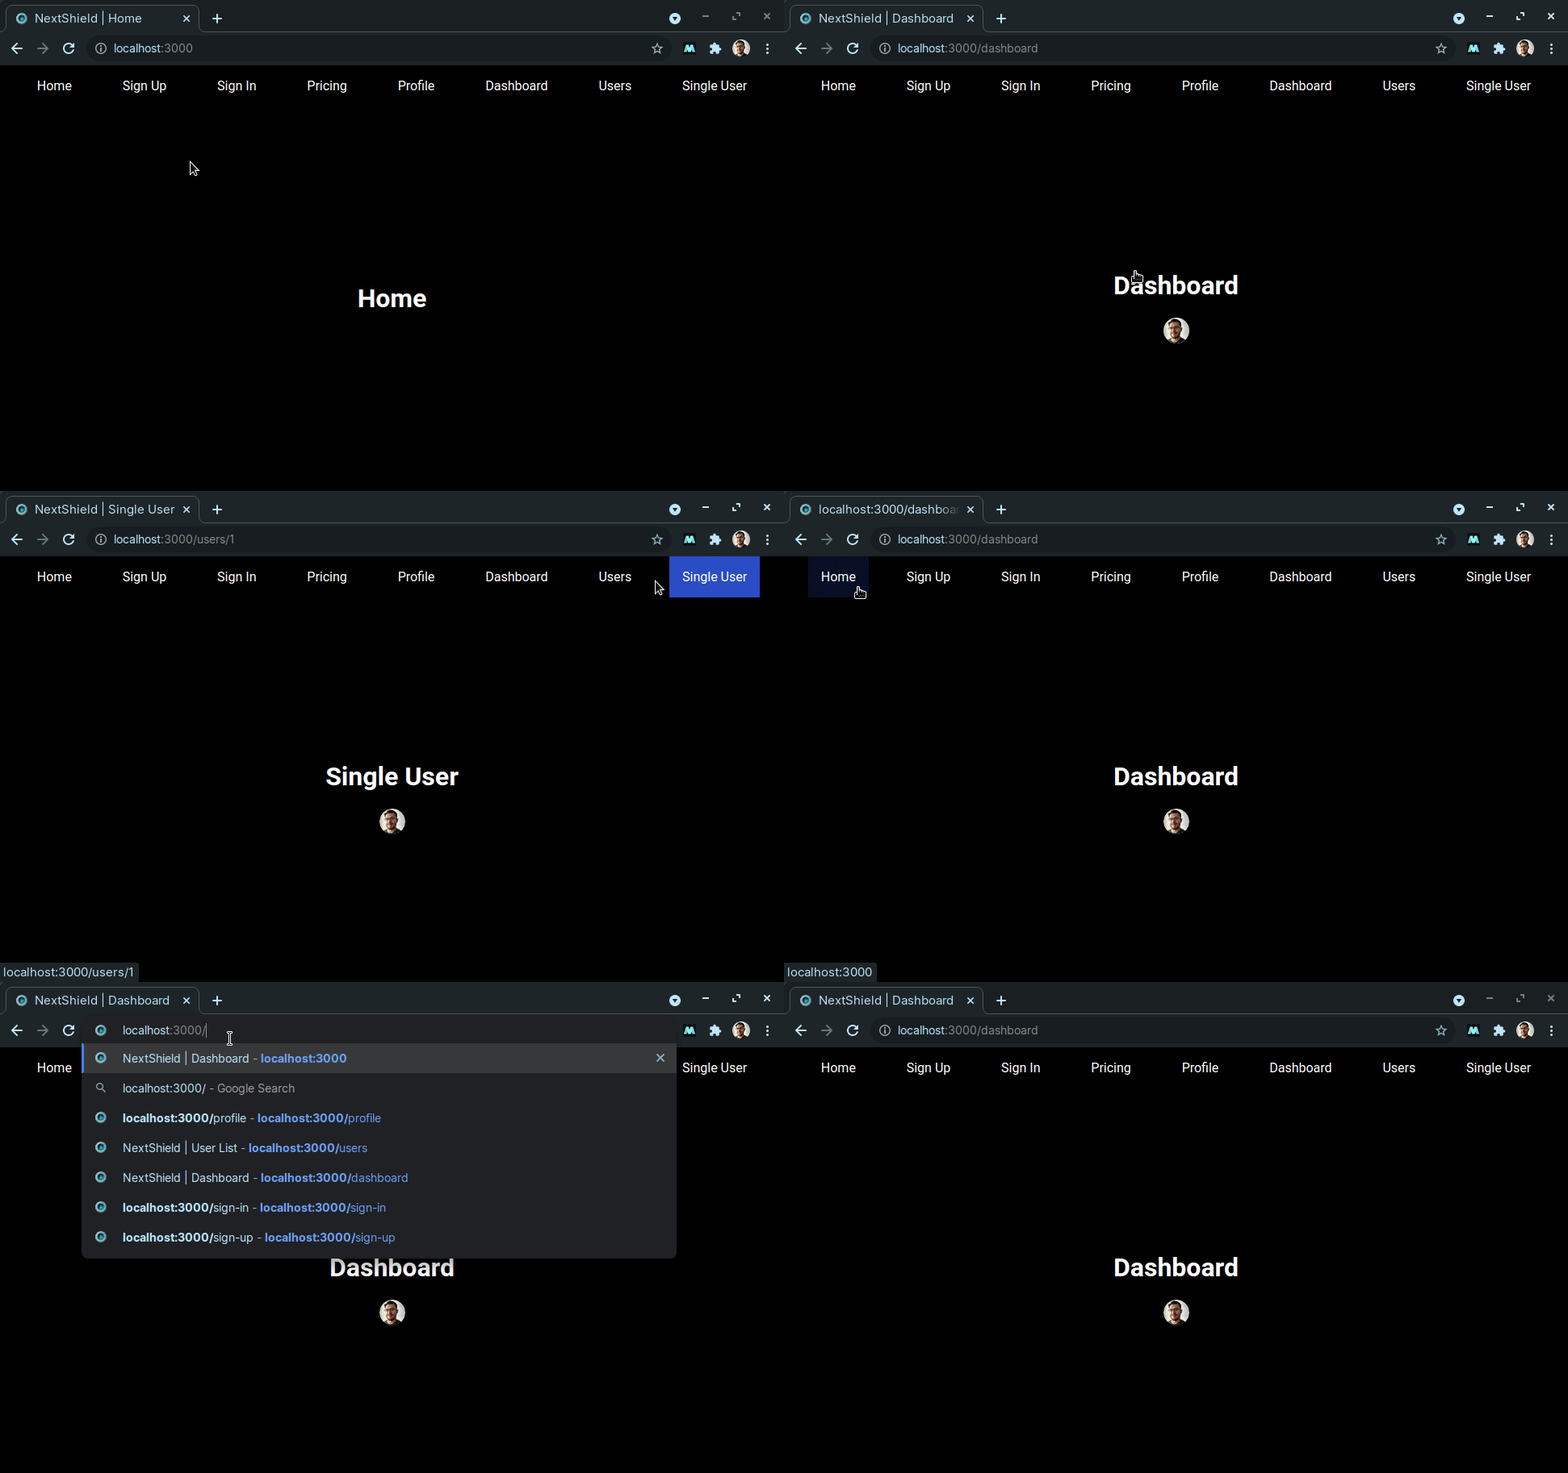
- And when logged in you have access to private and hybrid routes, the public routes are inaccessible:
Let's move things further and add RBAC.
### Add RBAC.
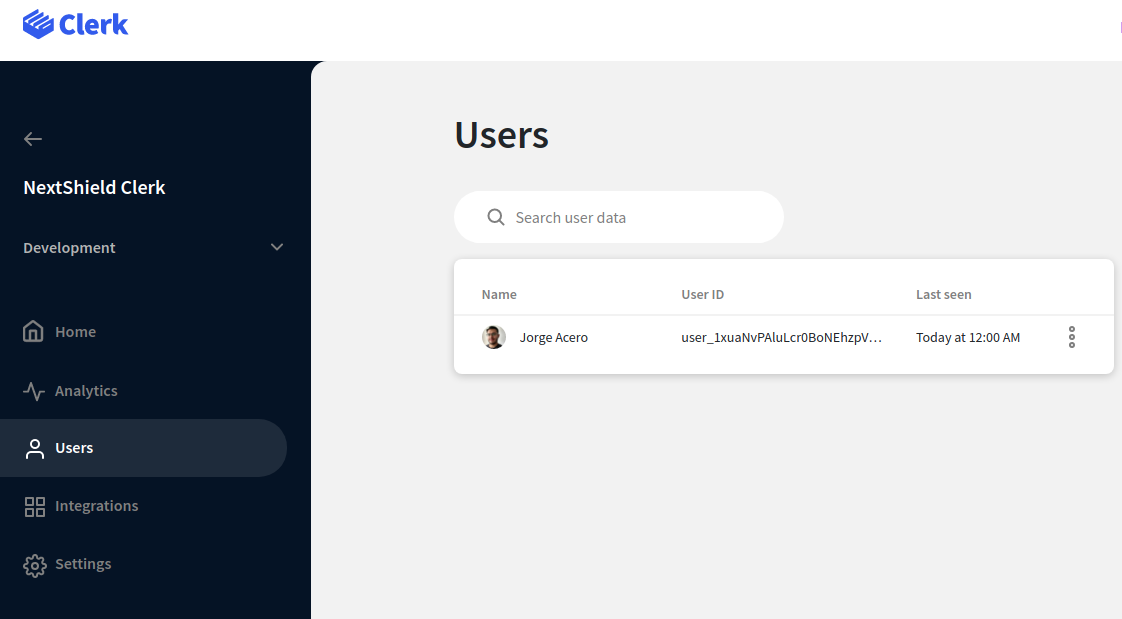
- Go to `Users` section on your dashboard and select your user:
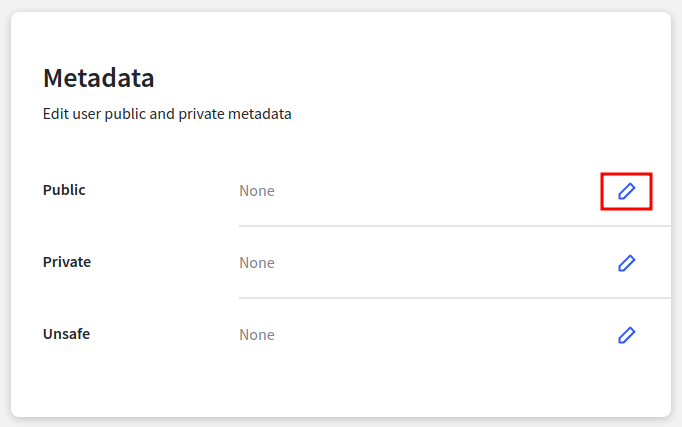
- Scroll down until the `Metadata` section and edit the public data:
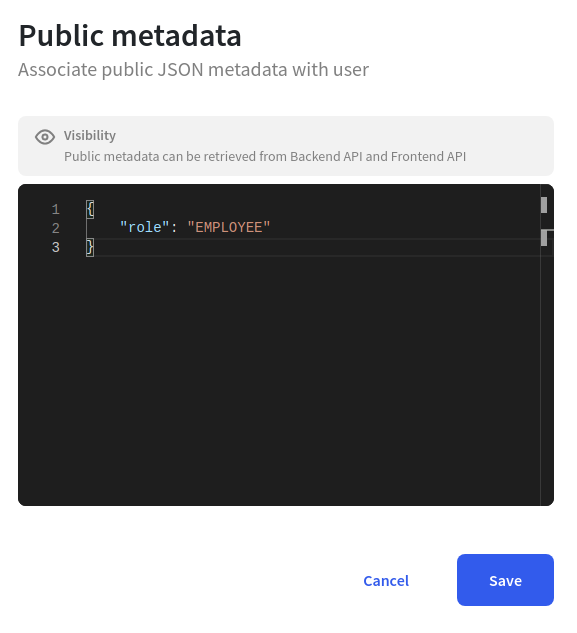
- Add the following content and save the changes:
- Go back to the Next.js app and create a new type under `types/User.ts`:
```ts
export type Metadata =
| {
role?: string
}
| undefined
```
- That's it, import the type in the `Shield` component, and create a constant with that type:
```ts
const { user, isLoading, isSignedIn } = useUser({ withAssertions: true })
const userMetadata: Metadata = user?.publicMetadata
```
- And define the roles in NextShield 😎
```ts
const shieldProps: NextShieldProps<
['/profile/[[...index]]', '/dashboard', '/users', '/users/[id]'],
['/', '/sign-in', '/sign-up']
> = {
router,
isAuth: isSignedIn(user),
isLoading: isLoading(user),
privateRoutes: ['/profile/[[...index]]', '/dashboard', '/users', '/users/[id]'],
publicRoutes: ['/', '/sign-in', '/sign-up'],
hybridRoutes: ['/pricing'],
loginRoute: '/sign-in',
LoadingComponent: ,
RBAC: {
ADMIN: {
grantedRoutes: ['/dashboard', '/profile/[[...index]]', '/users', '/users/[id]'],
accessRoute: '/dashboard',
},
EMPLOYEE: {
grantedRoutes: ['/profile/[[...index]]', '/dashboard'],
accessRoute: '/profile/[[...index]]',
},
},
userRole: userMetadata?.role,
}
```
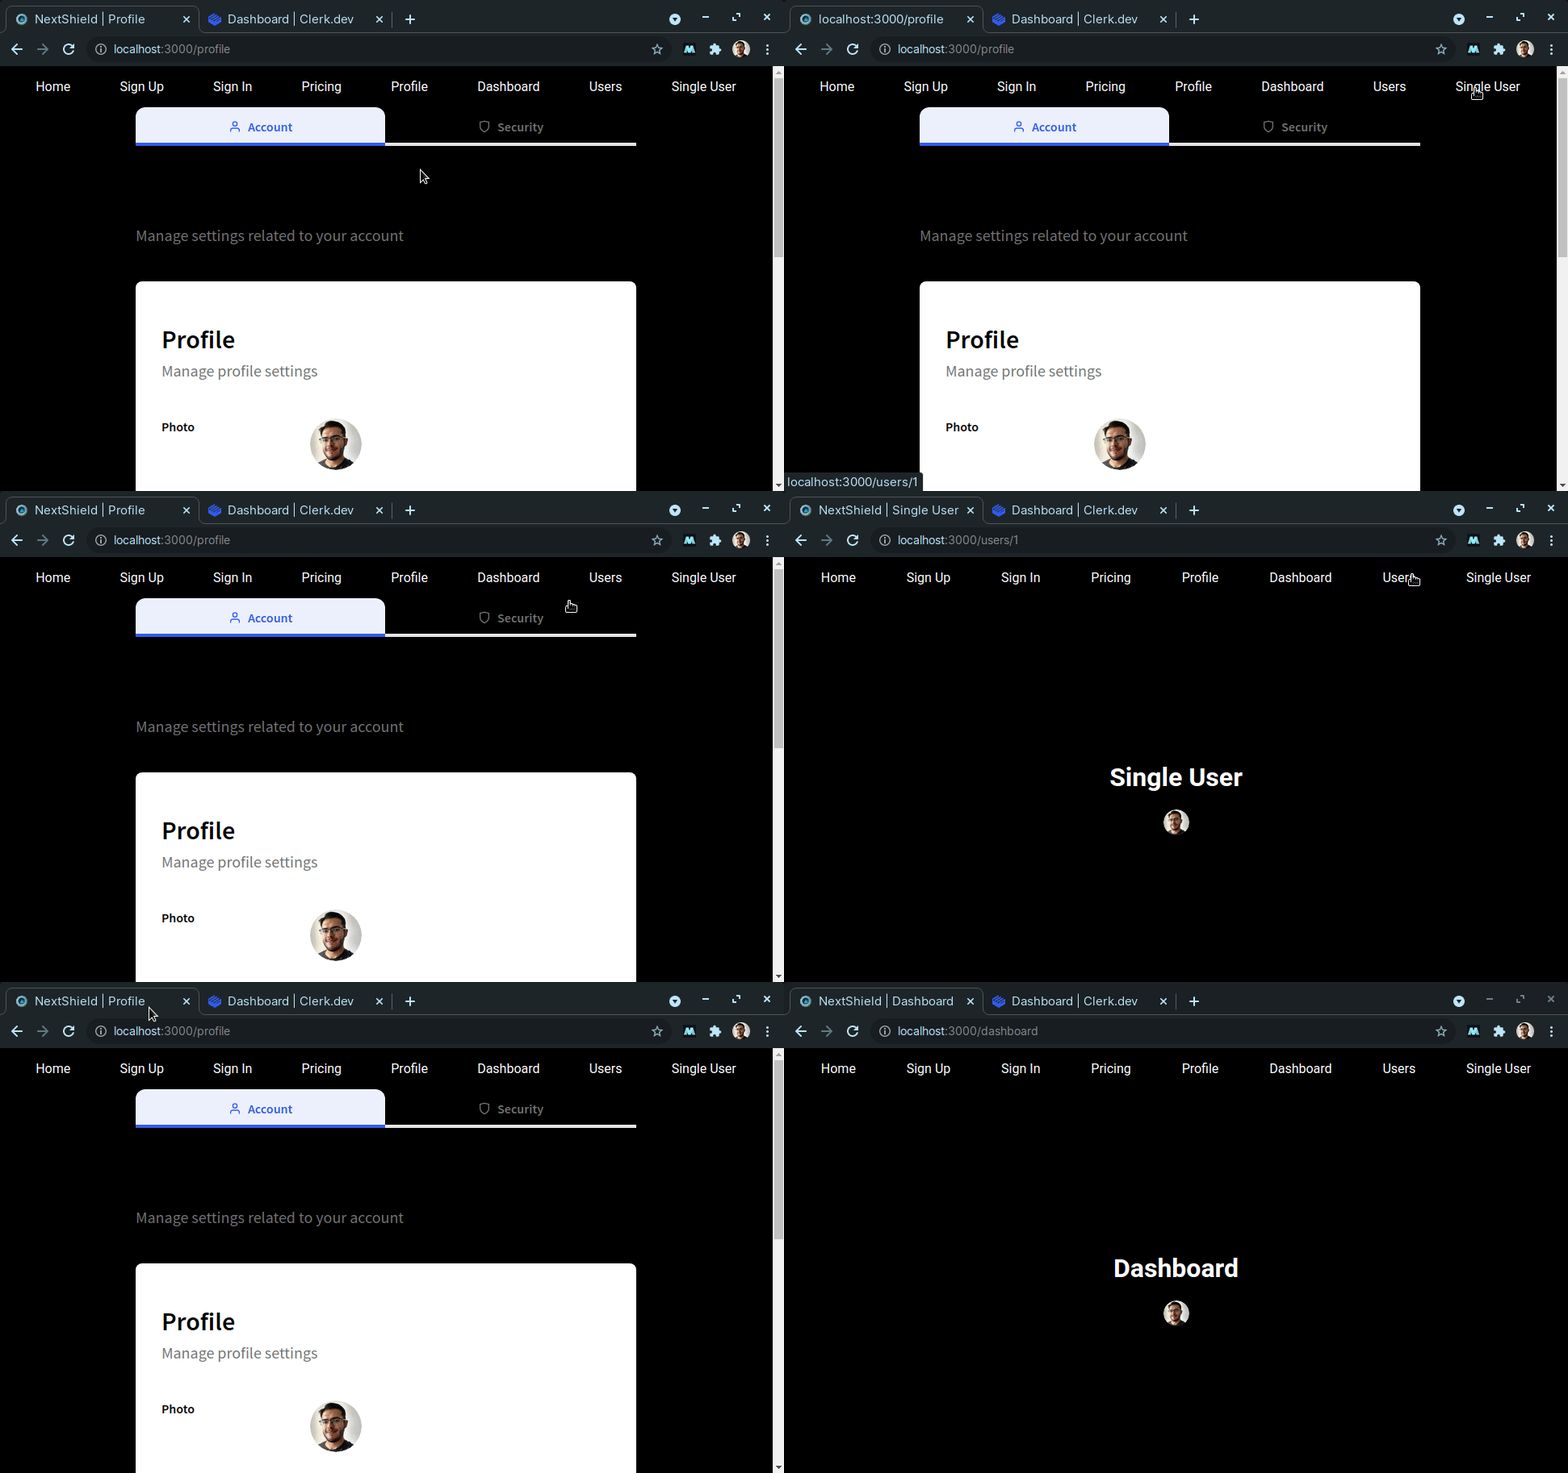
- The final app should look like this:
## Protect your componentes.
You can move things one step further and protect your components depending on the user's role or a custom condition, even if that user has access to that route.
Test this code in your pricing page and tell me what you think in the comments 😏:
```jsx
import { useUser } from '@clerk/clerk-react'
import { ComponentShield } from 'next-shield'
import { Layout } from '@/components/routes/Layout'
import { Metadata } from '@/types/User'
export default function Pricing() {
const { user, isLoading, isSignedIn } = useUser({ withAssertions: true })
const userMetadata: Metadata = user?.publicMetadata
return (
Pricing
You are unauthorized}
>
You are authorized
You are an admin
)
}
```
## Conclusion.
NextShield & Clerk make a perfect symbiosis!!!

- Real-time role change.
- Redirects automatically.
- Absolute 0 flashy content.
- Perfectly protected app.
You can get the completed example [here](https://github.com/imjulianeral/nextshield-examples/tree/clerk).
[Also you can read the complete NextShield series.
](https://blog.imjulian.com/series/next-shield)
# Bye!
Hope you like it, see you next time!